 |
Travel Pillows
|

I decide to buy all new pillows for my kids. I
found that the memory foam pillows helped with better support so I went and
bought 4 new pillows. I had the kids other pillows which were still in great
condition. Being the recycler that I am…I couldn’t just throw them away. So I
decided I could make toss pillows and travel pillows out of them!!! This was
exciting to me (I know I am easy to excite!) we do a lot of traveling and when
we do thousands of miles, the kids like to sleep and Tyce (My husband) and I
take turns driving, while the other sleeps. So with 6 of us, the cooler, all
our bedding and clothes it was sure cramped in the minivan. So by making these
pillows it is like the size of 1.5 pillows all together, rather than 6! I first
washed the pillow and bleached them (did I mention I hate germs?!) and dried it
completely, both dryer and air (The dryer actually kills a lot of bacteria and
germs FYI) Then I cut the pillows casing off and then cut the pillow into
sections (The size I thought would be good for support of each persons head).

I took an old quilt that was looking a little shabby and
wash it as well and cut a rectangle piece and sewed the old pillow casing on
the back. So this way the pillow had a quilted bouncy feel to it. The quilt was
too thick to use as front and back, it broke some needles… So this is why I did
the thinner material as the back. Leave a spot for you to stuff the pillow.
Then I turned it inside out making it look nice and neat on the outside and
placed the stuffing in the new pillow. I made them very firm, knowing they will
be used for back support, and squished a lot during our trips. I hand sewed
the spot were you stuffed it shut…I like to loop around for a tighter stitch,
but it’s your pillow!


I also made pillow
cases out of flannel material for each pillow. This way everyone knows, who’s,
is who’s and we aren’t sharing slobbery pillows :O) To store in the car,or in a closet at home, I take
a regular or large size pillow case and put all 6 travel pillows in that one,
to keep it neat and organized! We have already used them once and they were a
big hit! The nice thing is you can throw them in the wash in their pillow cases
and its only one wash load!
Recycled Pillows Make Great Toss Pillows!
 |
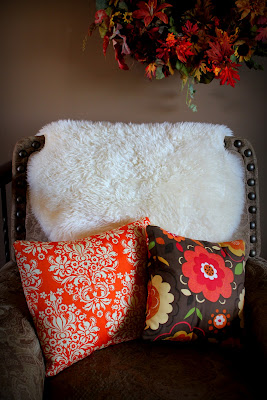
Now on the Toss pillows for my couches I did the same theory
of cutting it what size I wanted etc. and then stuffing it. I decided to make
the decorative part (exterior shell) to be a slip cover. I like material A LOT,
and I like to change up my décor in my home regularly…so rather then trying to
store 20 pillows for each season. I decided the slip covers could come off and
on with easy, and be folded and put in my hutch and take up very little room.
So on the back of the pillow I made the two folds over lap and left it open.
But I did do a seam on each side to give it the finished look. I made them so
they would fit tightly so they didn’t look like slip covers; knowing they would
need durability I doubled and even triple stitched them. I never can find cute
toss pillows at the store…just plain Janes with very little stuffing, and if I
do find one I like, they want $30 for one. I used left over material from
quilts I made…and recycled pillows and a recycled quilt. Easy Peasy! I will
always just make mine from now on!!!
|


